
In the middle of fixing the "fire engine" bike
Whether you enjoy working in the garage or not, it is not uncommon to find yourself with a gas engine that refuses to start. Even if it is just that lawnmower that worked fine last year, sat through the winter, and now you are wearing out your arm trying to bring it back to life. I thought it would be fun to put together a little tutorial on small engine repair. I have found that a small sampling of the basics will cover a large percentage of the problems you will face.
Over the last year I have had a couple friends bring 4 wheelers to the orange garage for repair. The great thing about these small engines is that they are infinitely more simple than fuel injected cars. The first one I fixed was a lawnmower engine off of a little buggy. I worked slow and took lots of pictures so I could put it back together. After bumbling my way through it I was surprised to find that some simple fixes were actually able to get it running. Since then I have repaired gokarts, lawnmowers, weedwackers, ATV's and motorcycles and for the most part they all have the same parts and the same problems.
To run, an engine needs a spark, compression, and good carbureted gas and air. When I troubleshoot something it is all about eliminating variables so I will start with the spark. 1) remove wire from top of spark plug 2) remove spark plug 3) With it still out, put the wire back over the top 4) touch the plug to the engine block or anything where it will be grounded 5) crank the engine

Before you actually replace the sparkplug you will want to take a look at the compression. Most people don't have a compression test kit at home but many auto parts places will loan them out, I got mine on the cheap at HarborFreight. While the spark plug is out you simply screw in the attachment in its place and crank the engine.

If it comes out exhaust then the exhaust valve is not seating. If it comes out at the air filter than the intake valve is not seating. If it comes out of the oil cap then the piston ring needs to be replaced. It may also come out around the head gasket. Poorly seated valves may just need to be cleaned and you can often visibly see large carbon deposits on them.
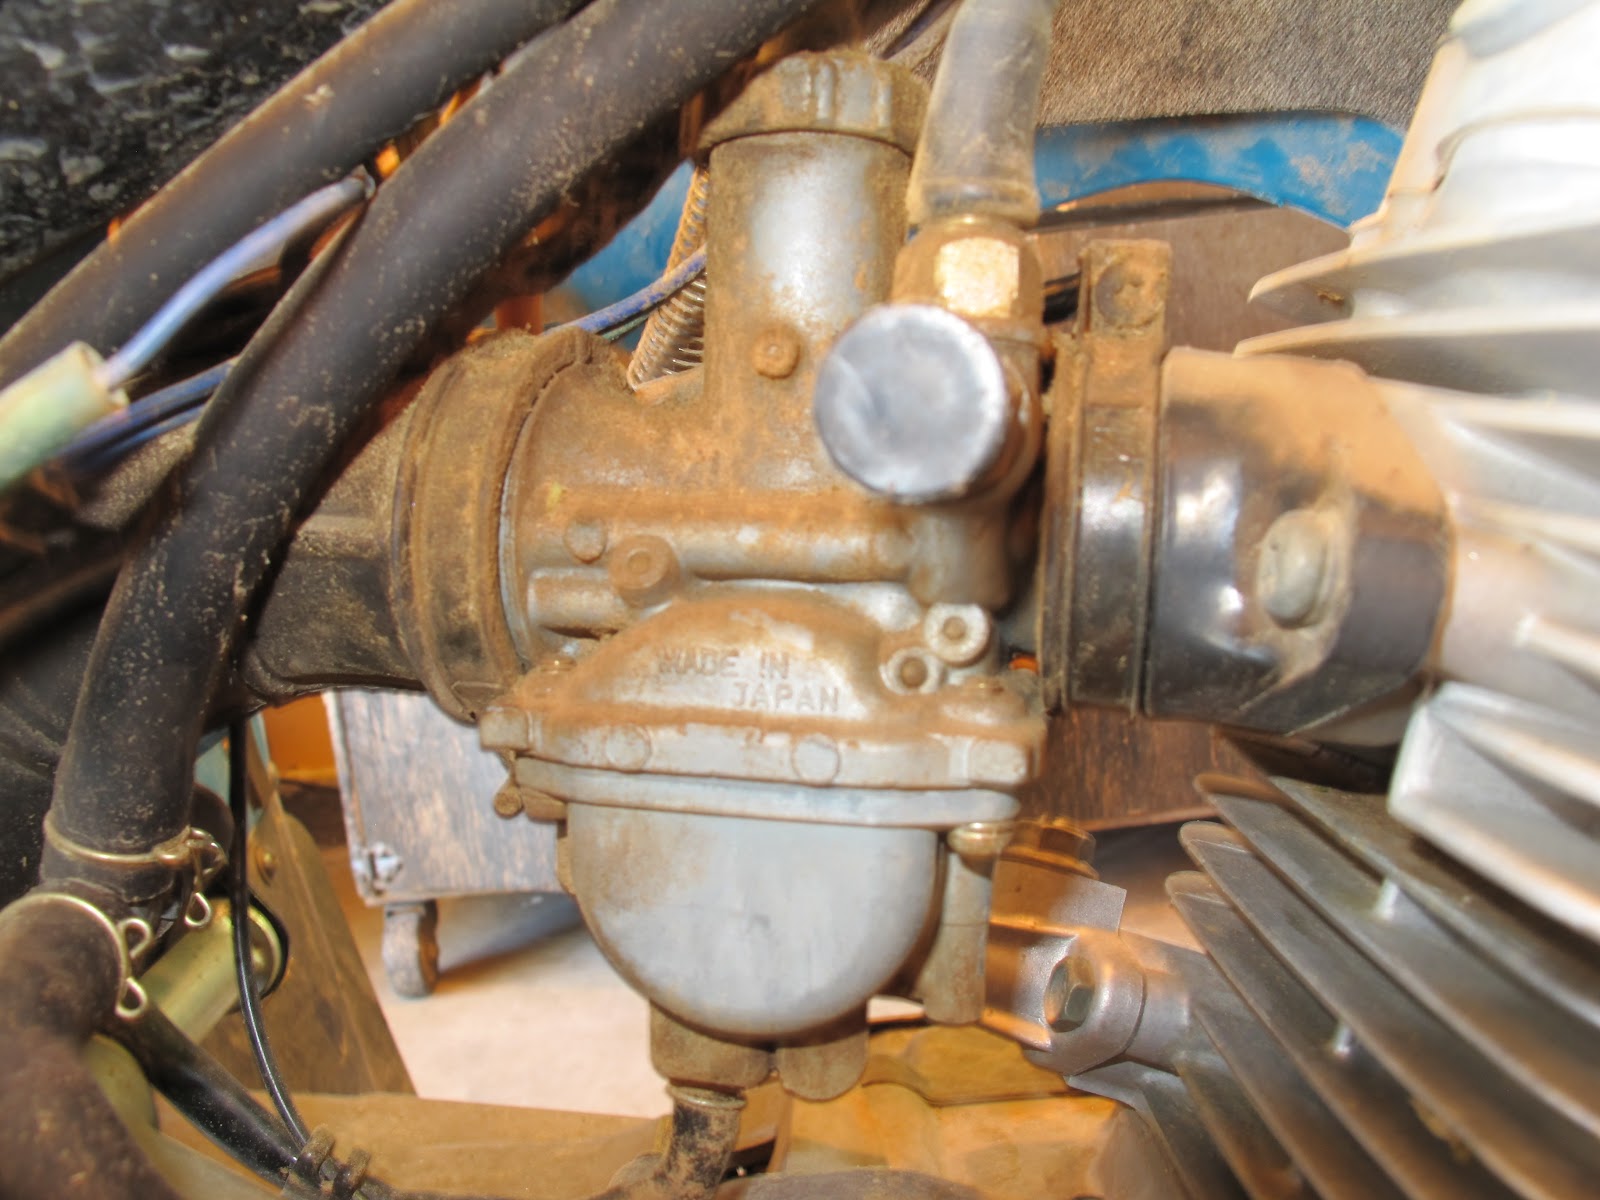
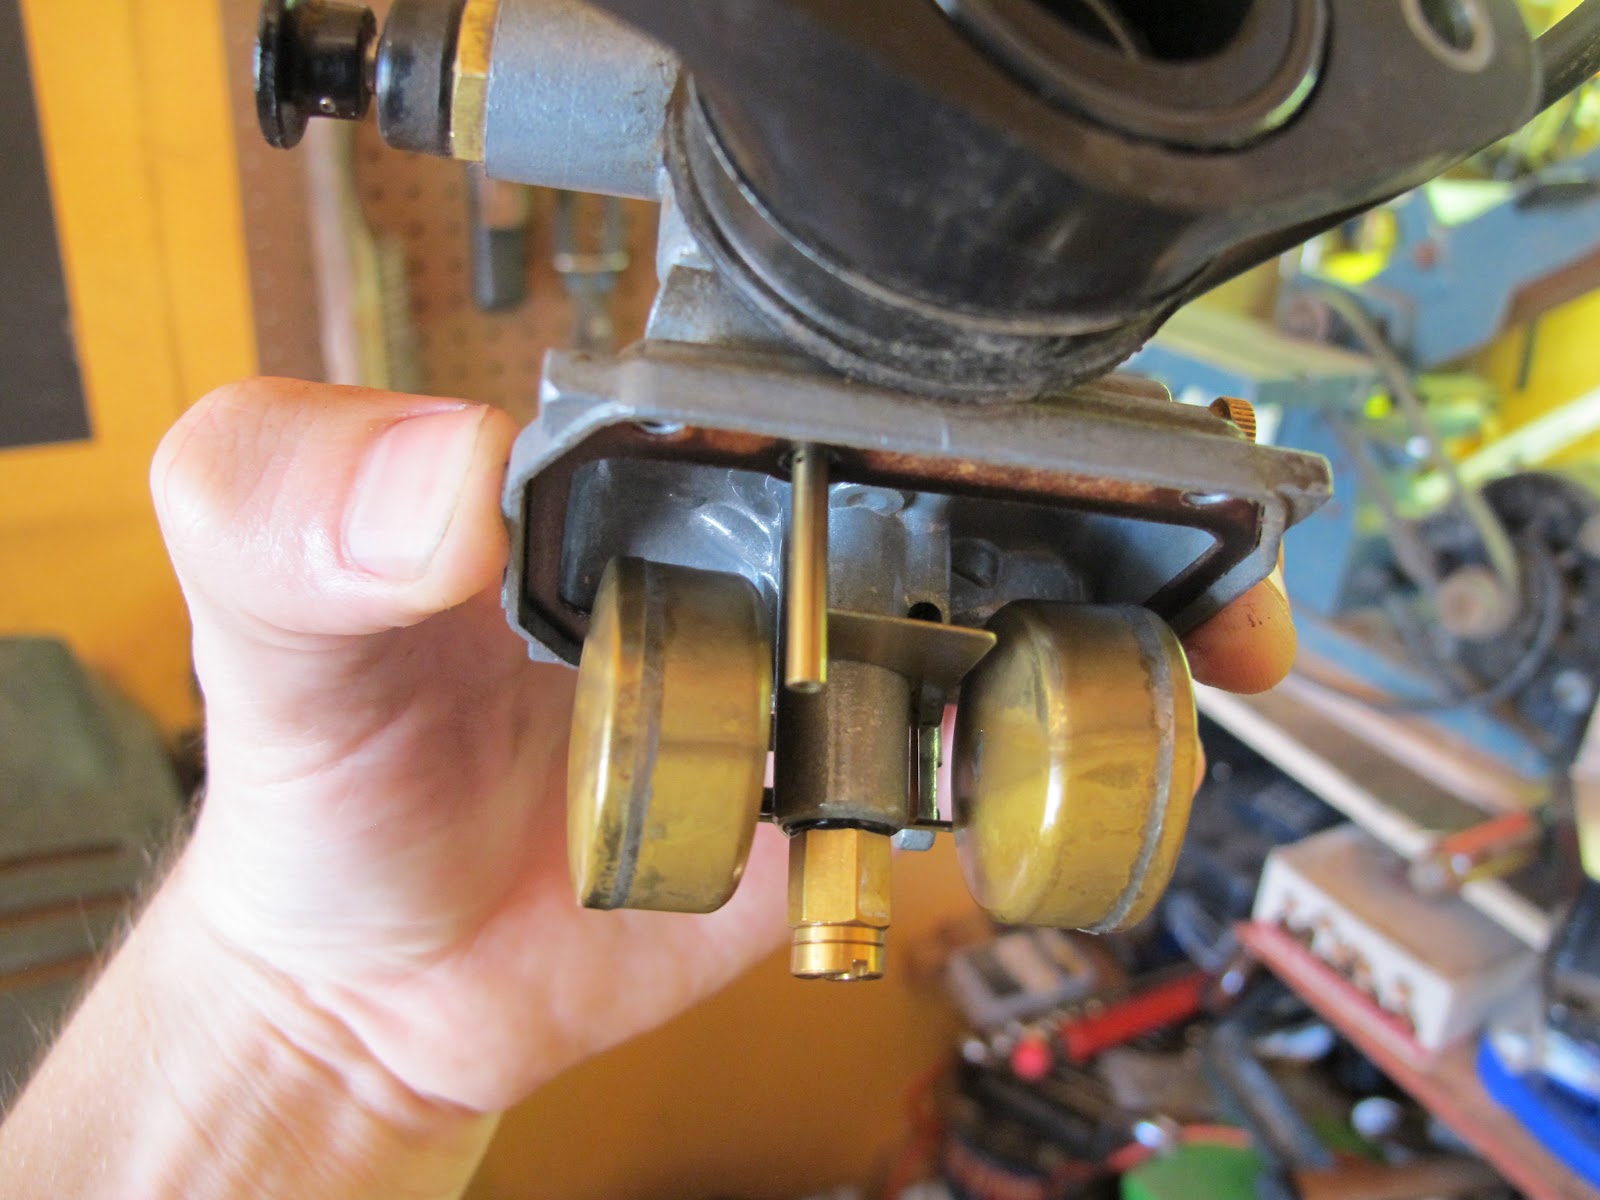
These first two tests go quick because they usually are not the problem. Most of the engines I have looked at were not getting fuel because of a dirty carburetor. First, a simple crash course in how a carburetor works. The car you drive is probably fuel injected, meaning it actually sprays fuel right into the cylinder, as opposed to most small engines (and older cars) which are carbureted. Basically the carburetor is in charge of mixing gas and air together right before it enters the cylinder. To do so the carburetor literally sucks the gas through tiny holes called jets. As the gas is sucked through the jets it turns into a mist so that it will burn well once it flows into the engine. Unfortunately the sucking power of the carburetor is limited so it can't suck it all the way from the gas tank. To make carburetor's job easier, it has what is called a fuel bowl sitting directly below it. The fuel bowl works very much like the tank on your toilet. It has a float valve that allows gas to fill the fuel bowl until its floats close the valve. This maintains a consistent amount of gas for the carburetor to conveniently suck from. The bottom of the fuel valve will often have a tube coming out where excess gas can leak out (like the overfill hole near the lip of your sink) and will also have a screw or bolt which you can open to drain gas from the bottom (a good idea for storing the engine,draining bad gas, or testing to see if gas is making it in at all)


With all that done, put her back together and cross your fingers. In most cases the engine should be able to start up but may need some tuning. If you follow the throttle cable to the carburetor you may be able to find a set screw which limits the motion of the throttles rest position. This is the idle set screw. Play with the set screw until the engine RPMs at idle are a healthy margin higher from where the engine dies. On the side of the carburetor you will also find another screw that adjusts how rich or lean the fuel mixture is.

I described how to be thorough and break down the carburetor but if the engine is not so bad off you may be able to take some shortcuts that don't involve you actually taking the carburetor and gas tank out. A good abbreviated approach would be to drain the old gas (be sure to not just drain the tank but also the fuel bowl), add fresh gas with SeaFoam added to it, remove the air filter and spray engine starter down the hatch and try to start the engine that way. It is also possible to pump up carb cleaner through the fuel bowl drain tube with carburetor in place, just be careful not to flood the engine in the process.
Sometimes the biggest obstacle is just being afraid that you will break something or never be able to put it back together. That usually isn't the case and 9 times out of 10 you won't regret the "just go for it" attitude. If I waited for a mentor every time I tried something new in the garage I would never get anything done, so hopefully I have inspired someone to tackle that dusty lawnmower in the corner of the garage instead of putting it on the curb or paying someone else to take care of it. And if I didn't then feel free to give me your "irreparable" four wheeler that you aren't using anymore...
I tried to keep this crash course tutorial brief so if you have questions or get stuck halfway through a project feel free ask any questions and I will try my best to answer!